Strongswan PSK Based Tunnel Using Debian VMs
The Scenario
Today we will be implementing a secure communication tunnel between two Debian gateways hosted on VMware Virtual Machines. Here is a rough sketch of the network interconnect

We shall setup two VMware machines with Debian 12 Linux, and install Strongswan from source in both of them. Also we’ll add two Network Interface Cards per VM so that we have two interfaces, one for the tunnel, and the other one for the subnet. After the above setup, we move towards Strongswan installaltion
Setting Up Strongswan
There are two methods of setting up Strongswan in Debian 12. We can either install it using the aptitude package manager (apt) or we can download the source code and compile it from there.
Installation From Package Manager
We proceed by first updating our repositories;
1
sudo apt update && sudo apt upgrade -y
Next, we use;
1
sudo apt install strongswan -y
All respective configuration files and folders can be found in the /etc directory after successfull installation.
Installation From Source
Before going into source code compilation, we need to take care of some dependencies.
Installing Dependencies
The Following libraries need to be installed as dependencies for strongswan.
- GMP Library
- OpenSSL Library
The GMP library is used for mathematical operations in Strongswan and OpenSSL contains implementations of various Cryptographic Algorithms.
1
2
3
sudo apt install libgmp10
sudo apt install libgmp-dev
sudo apt install libssl-dev
Source Compilation
We can now move towards downloading the Strongswn source. Then we will compile the source code to get a binary executable, using system C compiler and ‘make’ tool. Get the latest strongswan source using;
‘cd’ into your /home directory, create a new directory named ‘strongswan’ and ‘cd’ into it. Then run the following command;
1
wget "https://download.strongswan.org/strongswan-x.x.x.tar.bz2"
where the letters x.x.x can be replaced with the latest version available. At the time of this writing, we go with version ‘5.9.11’
The above command will download tar file of strongswan in the current directory. We can then use
1
2
tar xjf strongswan-x.x.x.tar.bz2
cd strongswan-x.x.x
to unpack the tarball and change the directory into the unpacked source of strongswan.
Now we run the configure script of Strongswan. Here we can choose different functionalities including plugins that we want to include or exclude from our build. We can also use the ‘–help’ option to see details of various configurable options. In our case, we’ll only include the ‘openssl’ plugin as follows;
1
./configure --prefix=/usr/local --enable-openssl
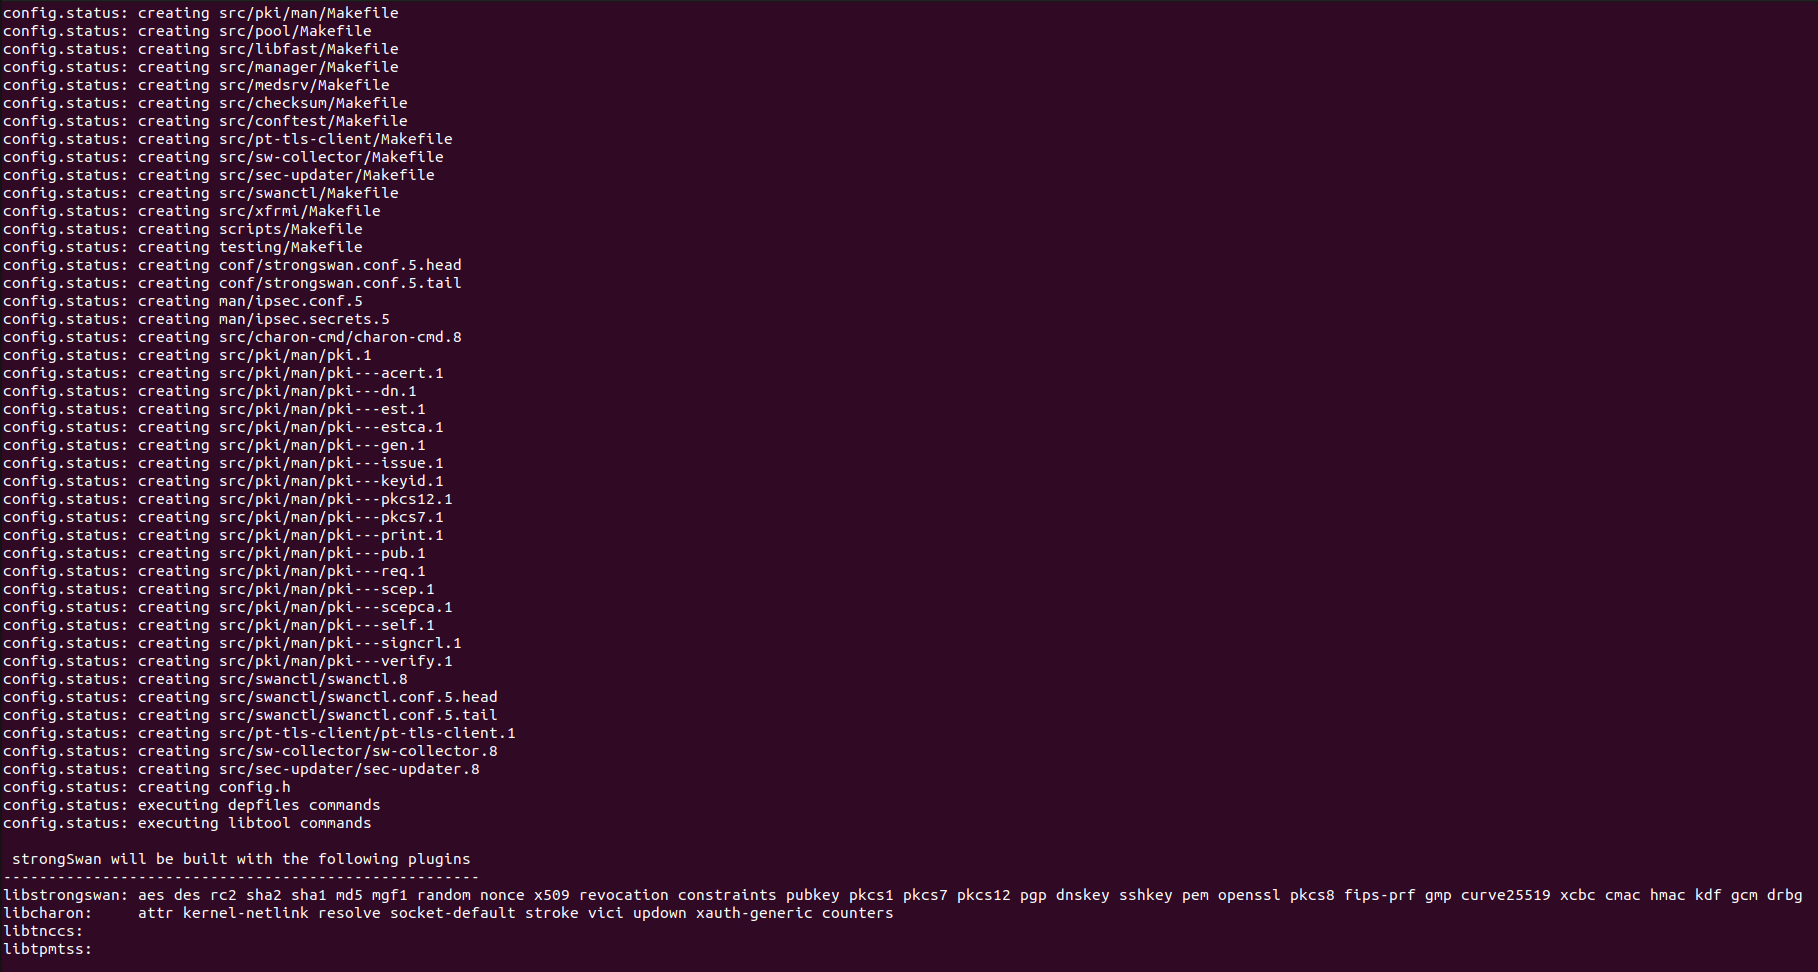
If this command ran successfully, it will show all the plugins that have been configured for installation in the next steps as shown in the snippet below.
Now we are ready to start the compilation process. In the same directory, we run
1
make -j<cores>
where cores is the number of cpu that you want to dedicate for the compilation process. Before running this command, we can use
1
nproc
to get the number of cpus that are available on our system, and then run the above ‘make’ command accordingly.
Next, we run the command;
1
sudo make install
to copy the important binaries and configuration files to appropriate locations so that they are accessible system-wide. Make sure to run it with ‘sudo’ beacuse copying to the directories in this step requires root privileges.
Once the installation is completed, we can move towards the tunnel configuration step.
IPsec Configuration Files
There are two methods of configuring Strongswan. One of them uses the legacy ‘stroke’ plugin, and the other uses the modern ‘vici’ plugin. Both of them are used to control and monitor IPsec connections. The stroke plugin uses two configuration files namely; ‘ipsec.conf’ and ‘ipsec.secret’ files. Both of them are found in /usr/local/etc/ directory in our installation. In this case, we’ll be using the stroke plugin and leave vici plugin for a future configuration.
ipsec.conf file
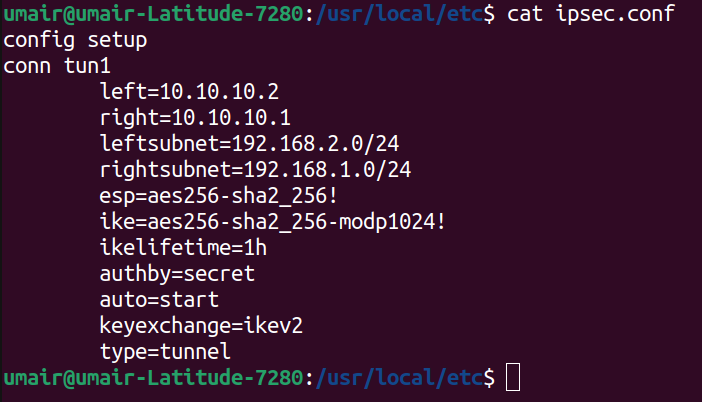
This file defines the various IPsec tunnels and their parameters. Below is a snippet of the ipsec.conf file used on the ‘VM Debian Gateway 2’
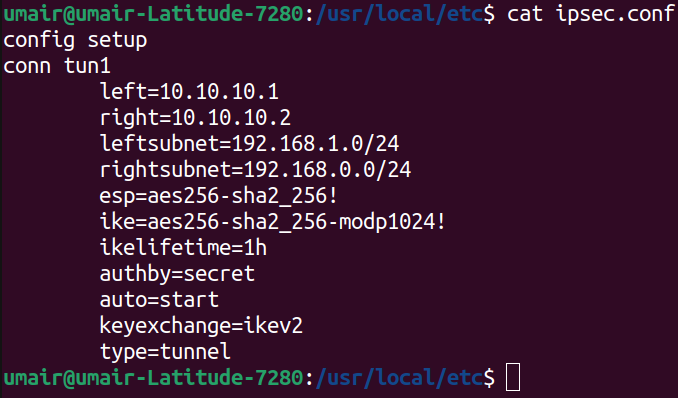
And similarly on ‘VM Debian Gateway 1’, we use the following ipsec.conf file
Below is a brief explanation of these configuration parameters.
- left: This specifies the IP address of current machine’s tunnel endpoint
- leftsubnet: This specifies the private subnet behind the left participant of the tunnel.
- right: This specifies the IP address of opposite endpoint of the tunnel on remote machine.
- rightsubnet: This specifies the private subnet behind the right participant of the tunnel.
- esp: This specifies a comma separated list of Encryption/Authentication algorithms to be negotiated between peers.
- ike: This specifies a comma separated list of IKE/ISAKMP Encryption/Authentication algorithms to be negotiated between peers.
- ikelifetime: This specifies the time after which a renotiation is to be performed for the keying channel.
- authby: This specifies how authentication is to be performed between peers.
- auto: This specifies the operation that needs to be done upon IPsec startup.
- keyexchange: This specifies the ike protocol version to be used for negotiation.
- type: This specifies the type of tunnel that will be created between peers.
ipsec.secrets file
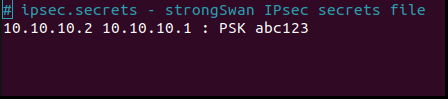
This file defines the secrets that will be used throughtout the IPsec process. In our specific case, we will use this file to store the ‘shared secret’ used between peers to authenticate each other. Below are snippets of this file on both Debian gateways. Following are the content of ‘ipsec.secrets’ file at ‘/usr/local/etc’ of both VMs. On ‘VM Debian Gateway 2’
On ‘VM Debian Gateway 1’ 
This completes the ‘configuration files’ step. We now move towards enabling the charon dameon and initiating tunnel connections.
IPsec Tunnel Management
We start by running
1
sudo ipsec start
This command call the ‘ipsec starter’ which parses our ipsec.conf file & starts the ‘IKE Charon Daemon’
If this command is being run directly after making desired changes in ipsec configuration files, then no additional command is required to load this configuration into the Charon daemon. We can directly run
1
sudo ipsec statusall
to see the status of ipsec tunnels.